

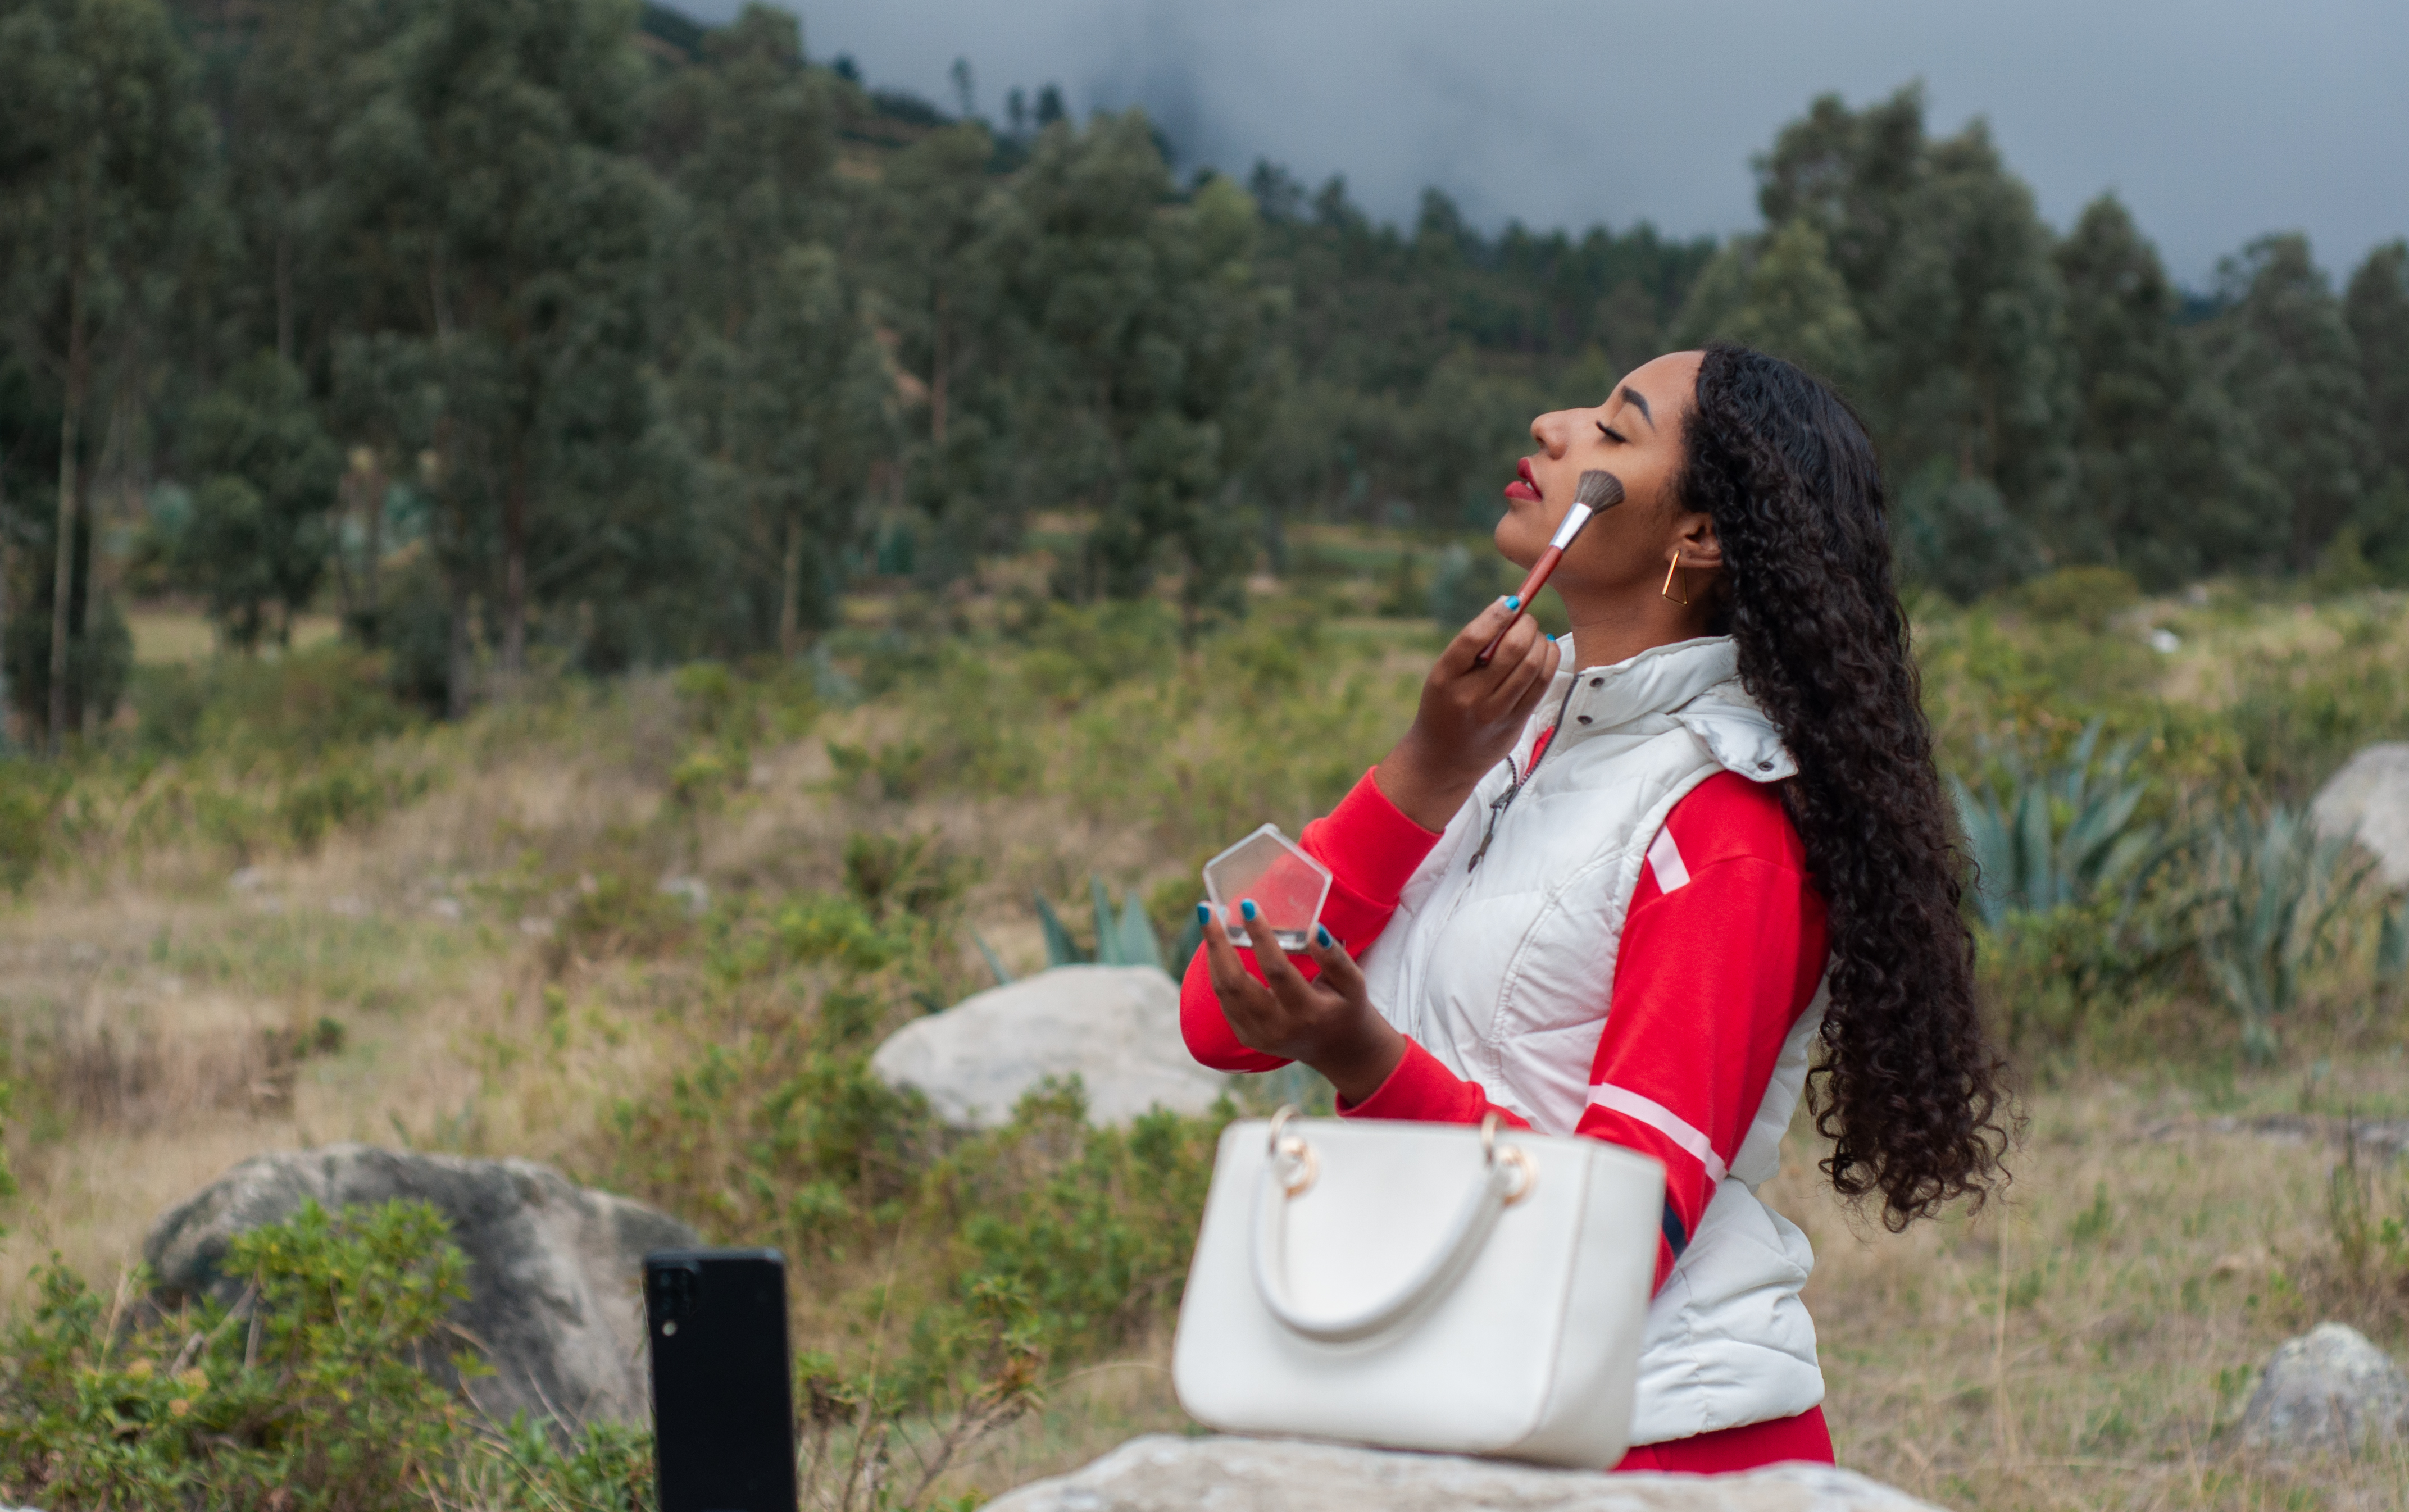
Choose a matte or satin finish, apply about twenty percent more color than your everyday routine, use waterproof mascara, skip foundations with SPF and heavy shimmer highlighters, and pack a real touch-up kit for the session day. That is the short answer. The longer answer depends on which kind of session you are shooting (senior portraits, family photos, or engagement pictures), what time of day the shoot falls in, and how hot it will be. In Phoenix, outdoor makeup has to survive real conditions: triple-digit heat in the warm months, dry wind almost year-round, and monsoon humidity from July through September. That changes the products, the application method, and the touch-up plan.
This guide covers makeup for outdoor senior, family, and engagement sessions specifically. Each of those three occasions has its own considerations, and we treat them as three related but distinct sub-topics. Skin prep, foundation, setting spray, and heat-management advice apply to all three. What is different for each occasion (personal expression for seniors, coordination across a family group, romantic softness for engagements) gets its own section. If you are looking for pregnancy-specific guidance, our separate post on makeup tips for maternity photos covers skin sensitivity changes, ingredients to consider avoiding during pregnancy, and comfort choices for longer maternity sessions. This post stays focused on the three non-maternity outdoor sessions.
The short answer: what actually works outdoors
For a fast checklist that applies to almost every outdoor session:
- Matte or satin base, never dewy or glittery
- Foundation matched to your neck, without SPF
- Translucent setting powder on the T-zone only
- Filled brows and waterproof mascara
- Slightly bolder blush and one shade deeper lip color than everyday
- A finishing setting spray
- A touch-up kit with blotting sheets, powder, and lip color
- A test run at home a week before the session
The rest of this guide walks through why each of those choices works, what changes for each type of session, and how to adapt the whole approach for Arizona heat and light.
Why photo makeup is different from your everyday routine
Cameras soften color. Natural light washes out cool tones. What looks polished in your bathroom mirror can read as bare or tired in a photograph shot outdoors at four in the afternoon. This is not a flaw in your makeup or your face. It is how camera sensors and outdoor light interact with cosmetics, and it is why photo makeup follows slightly different rules than everyday makeup.
The rough guideline that most experienced photo makeup artists use: about twenty percent more color than your everyday routine. Slightly more blush. Slightly deeper lip color. Slightly darker brow definition. Slightly more precise eye definition. The goal is not to look heavily made up. The goal is to look like the most rested, polished version of yourself that a camera can accurately capture.
The other big difference is longevity. An everyday makeup routine has to last through work or errands. A session routine has to last through outdoor heat, wind, movement, hugging, laughing, and, for engagement sessions, kissing. Formulas that hold up for four hours indoors may only hold up for one hour outdoors in Phoenix in July. Product choice and application technique both matter more than they do for daily wear.
Everything below is built on these two ideas: enhance more than you normally would, and choose formulas that hold up under real outdoor conditions.

Skin prep starts two weeks before your session
Every professional makeup artist we have worked with says the same thing: the difference between makeup that photographs beautifully and makeup that photographs poorly starts with skin, not with cosmetics. The best foundation in the world will not fix skin that was neglected the week of the shoot. Start prep two weeks out.
Two weeks out: skincare consistency, exfoliation, no new products
Two weeks before your session is the last window for introducing anything new to your skincare routine. Any new active ingredient (retinol, glycolic acid, salicylic acid, vitamin C serum) can trigger irritation, purging, or breakouts in the first two to three weeks of use. Do not test a new serum or a new moisturizer for the first time within two weeks of a shoot.
If you already use a gentle exfoliant, keep using it on your normal schedule. If you do not exfoliate regularly, do not start now. Twice-a-week exfoliation with a product your skin is used to will smooth texture without triggering redness. Skip strong chemical peels, professional facials with extraction, and any dermatological procedure that has downtime. These are worth doing three to four weeks before a session, not two.
The week of: hydration, no facials, no chemical peels
The week of the session is a maintenance week, not an experimentation week. Drink more water than you usually do. Eat foods with high water content. Cut back on sodium, alcohol, and heavily processed food, all of which contribute to puffiness in the face. Sleep on your back if you can, to avoid morning creases on the side you usually sleep on.
Do not book a facial in the week before your session. Even a “gentle” facial can leave your skin flushed for twenty-four to forty-eight hours. Do not book a professional lash lift or brow tint less than five days before the shoot. If either goes wrong, you need days to recover before session day, not hours.
The night before: sleep, low sodium, no alcohol
The night before your session, skip alcohol entirely. Even one drink increases puffiness in the face the next morning. Skip salty takeout, chips, and anything you know makes you retain water. Eat a normal dinner at a normal time. Drink a full glass of water before bed.
Get eight hours of sleep. If you know you sleep poorly in the run-up to something important, plan for it. Melatonin or magnesium can help. A dark, cool room helps. Setting your phone across the room helps. Your skin, your under-eye area, and your overall energy all show up on camera, and no makeup fixes the look of a face that got four hours of sleep.
The morning of: cleanse, moisturize, sunscreen mindfully
Cleanse with your usual gentle cleanser. Do not scrub. Apply your usual moisturizer, giving it time to absorb before makeup goes on. If you are prone to under-eye puffiness, a cold compress or a jade roller from the freezer for two to three minutes reduces it noticeably.
Sunscreen is where things get complicated for photo makeup. Chemical sunscreens are usually fine. Mineral sunscreens with high concentrations of zinc oxide or titanium dioxide can cause white cast on camera under bright sun. If your shoot is outdoors and you use a mineral sunscreen, either use a tinted mineral sunscreen or apply a very thin layer and give it a full ten minutes to absorb before foundation goes on. For an outdoor shoot in Phoenix, protecting your skin from sun exposure still matters. The workaround is choosing the right formula, not skipping sunscreen entirely.

Foundation and base for camera-ready skin
Foundation is the biggest single decision in photo makeup. The wrong foundation reads mask-like, flashes back under bright light, or oxidizes into a different shade halfway through your session. The right foundation looks like your own skin, only cleaner.
Match your foundation to your neck, not your face
Faces are almost always a slightly different color than necks, especially in Phoenix where the face gets more sun exposure than the neck under a collar or hairline. A foundation matched to your face color often shows a visible line at the jaw on camera. A foundation matched to your neck blends seamlessly.
Test foundation on the underside of your jaw in natural daylight, not indoors. Apply a small stripe of two or three shades and step outside to a shaded area. The shade that disappears into your skin is your match. The shade that shows up as a stripe is not.
Why to skip foundations with high SPF
Sunscreen ingredients (specifically titanium dioxide and zinc oxide, the mineral SPFs) reflect camera flash. On cell-phone photos and casual pictures indoors, this shows up as a pale, ghostly cast on the face. Outdoors under bright natural light it is less dramatic but can still lift the tone of your face out of sync with your neck.
For an outdoor session, skip foundations that advertise SPF 20 or higher. Choose a foundation with no SPF, or SPF under 15, and apply a separate sunscreen underneath that has absorbed fully before the foundation goes on. This gives you real sun protection without the flashback.
Silica-heavy powders and flashback
Silica is a common ingredient in translucent setting powders. It absorbs oil and gives skin a soft-focus finish. It also reflects light in a way that can register on camera as a white halo around the T-zone, especially under flash. Outdoors in natural light this is less common but can happen at midday when the sun is at its brightest.
If your session is outdoors and you want to set your foundation, choose a setting powder without heavy silica. Rice powder, cornstarch-based powders, and translucent powders labeled as HD-friendly all work. Test any new setting powder on camera before session day.
Building coverage in layers rather than one heavy pass
The single biggest mistake in photo foundation is applying too much in one pass. A heavy layer of foundation reads as makeup on camera, hides skin texture, and creases into fine lines and pores. Build coverage in thin layers instead.
Start with a light layer of foundation across the entire face. Let it set for thirty seconds. Add concealer only where you need more coverage: under the eyes, around the nose, over blemishes. Blend everything with a damp beauty sponge, which absorbs excess product and leaves a thinner, more natural layer than a brush. If you still see something you want to cover, add a second thin pass of concealer to that specific spot. Do not go back over the whole face with more foundation.
Foundation choices by skin tone
Different skin tones photograph differently and have specific considerations.
For fair complexions, look for a foundation with a slight yellow or peach undertone rather than a pure pink base. Pink undertones can read flushed on camera, especially in warm outdoor light. Warm-neutral bases photograph most naturally.
For light-to-medium complexions, warm undertones (peach, gold, honey) usually photograph well. Cool-toned foundations can look ashy in outdoor light. Test in natural light before committing.
For medium-to-olive complexions, warm and neutral tones both work. Yellow-based foundations are the safest choice. Anything too pink or too orange will read off.
For deep complexions, undertone matters more than lightness. Look for red, orange, or golden undertones based on your natural warmth. Foundations that are too gray or too ashy will look dull on camera. A slight sheen (satin, not shimmer) usually photographs beautifully on deeper skin tones.
Test in the same light you plan to shoot in. Bathroom light is misleading. Natural window light at 3 pm gives you the closest match to session conditions.

Setting powder and T-zone shine control
Setting powder locks foundation in place and controls shine. Used well, it makes makeup last longer and photograph cleaner. Used heavily, it flattens your face and drains dimension.
How much translucent powder is too much
The right amount of setting powder is barely visible when you touch your face. If you can see powder on your skin, you have used too much. If your face looks flat and matte across every surface, you have used too much. If your foundation looks like it settled into your pores after powder, you have used far too much.
The trick is a small amount, applied only where you need it. Use a large fluffy brush and tap off excess before touching your face. Press the powder in with the brush rather than sweeping. Press-and-lift, not sweep, keeps the powder on top of the foundation instead of pushing the foundation around.
Where to set and where to leave alone
Powder the T-zone (forehead, nose, and chin). These are the areas that produce the most oil and shine on camera. Leave the cheeks, temples, and undereyes alone unless you have specific concerns. The cheeks are where light naturally hits your face in most portrait poses, and a matte cheek can read flat. A natural-finish or slightly satin cheek reads dimensional.
If you have oily skin generally, add a light dust across the whole face. If you have dry skin or combination skin with dry cheeks, keep powder off the cheeks entirely.
Blotting sheets are not optional in Arizona
In Phoenix outdoor sessions, blotting sheets do a job that powder cannot. Powder controls shine by adding a layer on top of your skin. In heat, that layer mixes with fresh sweat and turns cakey. Blotting sheets remove the oil and sweat without adding anything to your face.
Pack a full pack of blotting sheets in your session bag. Between setups, blot the T-zone gently. Do not rub. Then, if you still need more matte finish, tap on a very small amount of translucent powder. Blot first, powder second. Never the reverse.

Eyes and brows for photo makeup
Eyes are where cameras soften makeup most. What looks defined in your mirror often reads as understated on camera. Slightly more definition than everyday is the rule.
Eyebrow shaping and filling
Well-groomed brows frame your face and make the difference between “put together” and “casual” on camera. Fill in sparse areas with a brow pencil, powder, or pomade in a shade that matches your natural brow color. Do not go darker than your natural brows unless you have very light hair, in which case one shade darker than your hair reads best on camera.
Use short, hair-like strokes rather than filling the entire brow with a solid line. Blend with a spoolie brush. Set with a clear brow gel to hold the shape through wind and movement. In Phoenix wind, unset brows shift throughout a session and lose their defined shape by the end.
Get any brow shaping (waxing, threading, tinting) done at least three days before your session. Redness from waxing takes twenty-four to seventy-two hours to fade fully. A brow tint that looks too dark right after application usually softens within two days.
Neutral eyeshadow that reads on camera
Neutral matte and soft satin eyeshadows photograph better outdoors than bold colors or shimmers. Warm browns, soft taupes, warm beige, and muted mauves all read as polished on camera. Reserve bold or shimmery colors for indoor sessions where lighting is controlled.
The classic three-shadow application still works: a light shade across the lid, a medium shade in the crease for depth, a slightly darker shade blended into the outer corner for definition. Blend every edge. Hard lines read as harsh on camera, which flattens the eye shape.
Skip glittery shadows entirely for outdoor daytime sessions. Actual glitter (as opposed to fine shimmer) catches sun as sharp reflective points that read as distracting highlights in your images.
Eyeliner: where to place it and where to skip it
A soft brown or black eyeliner along the upper lash line, close to the roots of the lashes, adds definition without reading as heavy makeup. Do not draw a thick winged line for a daytime outdoor session unless it is genuinely part of your everyday look. Wings can read as costume in casual outdoor images.
Skip heavy lower-lash eyeliner. Thick liner under the eye can make the eye look smaller when you smile, and it accentuates fine lines in that area. If you want lower-lash definition, use a small amount of matte eyeshadow softly smudged under the outer third of the lash line. It reads softer than pencil.
Waterline liner (inside the lower lash line) also tends to make eyes look smaller on camera. Skip it for outdoor daytime shoots. If you want extra brightening, a nude or warm-white pencil on the waterline opens the eye without darkening it.
Waterproof mascara for outdoor sessions
Waterproof mascara is not optional for outdoor sessions. Wind causes watering eyes. Sweat on the upper lash line runs into mascara. A bright laugh or emotional moment during an engagement session can produce tears. Regular mascara will smudge in any of these scenarios. Waterproof mascara holds.
Apply two coats to the upper lashes. Curl your lashes before mascara, not after. If you use a lash curler, do it before any mascara touches the lashes to avoid pulling out lashes when they stick to the curler.
Skip lower-lash mascara for outdoor sessions if you tend to smudge easily. If you use it, apply one very light coat with a small brush, and blot excess against a tissue before touching your lashes.
When false lashes help and when they hurt
Individual flare lashes on the outer corners give a subtle lift that photographs beautifully. A full strip of dense false lashes can make eyes look smaller on camera and often reads as heavy for a natural outdoor look. If you love false lashes, choose a lightweight, wispy style rather than a dense, dramatic one.
Apply false lashes at least an hour before the session. Adhesive needs time to fully cure, and shifting lashes are visible on camera. If you have never worn false lashes before, do not test them for the first time on your session day. Do a full trial at least a week ahead.
Lash extensions applied at a professional salon are a strong alternative for outdoor sessions. They photograph consistently, do not need daily application, and do not shift in heat. Book extensions at least three days before the session so any allergic reaction has time to show up (rare, but possible).

Cheeks: blush, bronzer, and contour
Cheeks are where color and dimension go missing on camera. Natural light washes out flush. Cameras flatten the shape of the face. The right cheek products bring back both.
Adding blush deliberately so your face does not wash out
The most common mistake in photo makeup is not enough blush. What looks bright and flushed in the bathroom mirror often reads as barely-there on camera outdoors. Apply blush slightly more heavily than your everyday routine, focused on the apples of the cheeks and swept slightly up toward the temples.
Cream blush photographs more naturally than powder blush because it reads like a natural flush rather than a layer of product. Apply cream blush before setting powder, so the powder locks it in. If you prefer powder blush, layer it lightly and blend the edges thoroughly.
Peach and warm pink blushes photograph well on most skin tones. Cool pinks can read bluish on camera, especially in shade. Berry and plum blushes work beautifully on medium-to-deep skin tones in warm outdoor light.
Bronzer for warmth without a stripe
Bronzer adds warmth back into skin that foundation has slightly flattened. Apply lightly to the temples, upper cheekbones, jawline, and the tip of the nose, blending thoroughly. A soft, buildable powder bronzer is easier to control than a heavy one.
Skip shimmery bronzer for daytime outdoor sessions. Matte or very soft-satin bronzer photographs cleanest. Bronzer that has visible shimmer will catch sun as small reflective points on the face.
Match bronzer tone to your undertone. Warm-toned bronzers on cool skin can read orange. Cool-toned bronzers on warm skin can read muddy. Test on the jawline in daylight before committing.
Contour that photographs (and contour that does not)
Subtle contour under the cheekbones and along the jawline adds dimension that reads well on camera. Heavy, obvious contour that shows visible lines does not. The rule for photo contour: someone looking at a picture of you should not be able to tell you contoured.
Use a matte contour product one to two shades deeper than your skin tone. Apply with a small brush and blend thoroughly. Blend more than you think is needed. If you can see the contour line after blending, blend again. Skip cream contour for hot outdoor sessions unless you know it holds through heat on your skin.
For a natural outdoor look, many faces do not need any contour at all. If you have naturally defined cheekbones or a strong jawline, skip contour entirely. Blush and bronzer will do the shaping work.
Why heavy shimmer highlighter reflects wrong outdoors
Highlighter is beautiful indoors under controlled light. Outdoors under bright natural sun, heavy shimmer highlighter reads as grease or hot spots on the face. The higher the shimmer, the worse the effect.
If you love highlighter, choose a soft satin finish rather than a metallic or glittery one. Apply lightly to the tops of the cheekbones, the inner corners of the eyes, and the cupid’s bow. Skip highlighter on the nose bridge for outdoor sessions because it exaggerates any shine that develops there. Skip powder highlighter with visible glitter entirely for outdoor daytime sessions. Save the sparkly finishes for indoor sessions or evening blue-hour shoots.

Lips that photograph and last
Lips are the second most likely place makeup fails during a session. Sticky gloss picks up hair in the wind. Bright colors fade unevenly. The wrong finish reflects sun.
One shade deeper than your everyday nude
For outdoor sessions, choose a lip color one shade deeper or slightly more pigmented than your everyday nude. Colors that match your natural lip almost exactly can read invisible on camera. A soft rose, a warm nude, a mauve, or a warm terracotta all photograph as “you but polished.”
If you normally wear bright red, keep wearing bright red for a session. Bold colors that are already part of your style read as intentional and personal. What does not work is a bright bold color you have never worn before, applied for the first time on session day. Everything you wear on your face should be something you feel like yourself in.
Satin and matte over sticky gloss
Sticky gloss picks up hair in wind. Full high-shine gloss reflects sun as bright spots on the lip. Neither photographs well outdoors. Satin and matte finishes photograph cleanly and hold up better through a session.
If you want the look of gloss without the stickiness, use a satin liquid lipstick or a lightweight tinted balm. Both give shape and color without the reflective flare of a heavy gloss. If you love a specific gloss, apply it only on the center of the lower lip for dimension, and leave the rest of the lip in a matte or satin base.
A soft lip liner as insurance
Lip liner extends the wear of any lip color. Apply a soft liner in a shade that matches your lipstick, filling in the entire lip (not just the outline) before applying the lip color on top. This gives you a color base underneath that shows if the top layer wears off, and it prevents feathering at the edges.
Skip a liner that is significantly darker than your lipstick. Visible dark outlines around the lip read as dated on camera. The liner should be the same tone as the lipstick or one shade softer.
Long-wear formulas and what ``long-wear`` actually means
“Long-wear” on packaging means different things across brands. Some claim eight hours and hold for three. Some claim twelve hours and hold for eight. The only way to know is to test.
Do a full-day test at home a week before your session. Apply your lip color in the morning. Note what happens after two, four, and six hours. Note what happens when you drink water, eat, or touch your face. If the color transfers heavily, migrates, or fades unevenly, that product is not right for the session.
For outdoor sessions in Phoenix heat, transfer-resistant liquid lipsticks tend to outperform waxy traditional lipsticks. The trade-off is that liquid lipsticks can feel drying. Prep with a lip balm applied twenty minutes before, blot before applying color, and apply in thin layers. A properly-prepped lip in a liquid lipstick can hold for four or more hours in Phoenix heat.
Setting spray, the final lock
Setting spray is the last step and matters more in Arizona than almost anywhere else. It locks powder to foundation, foundation to skin, and eye makeup to eyelids. Without it, everything you have applied has a shorter lifespan under heat and movement.
Apply setting spray after all makeup is complete. Hold the bottle six to eight inches from your face and mist in an X and T pattern to cover the whole face without over-saturating any one area. Let it air dry. Do not blot or wave. Movement while wet can move product.
Choose a matte-finish setting spray for daytime outdoor sessions rather than a dewy or radiant one. Dewy setting sprays can amplify sun reflection on the face at midday. Matte or natural-finish sprays photograph cleanly.
Reapply setting spray between outfit changes or after any major sweating. Blot first with a blotting sheet, tap on a small amount of powder if needed, and then re-mist with setting spray. This resets your makeup to close-to-fresh without a full reapplication.

Makeup tips for senior pictures
Senior portraits are the most personal of the three occasions covered here. This is a photo of you at a specific chapter of your life, and it will exist on your parents’ wall, in your graduation announcements, and in albums for decades. The makeup should look like you at your best, not like a different person.
What makeup to wear for senior pictures
Start with your everyday makeup routine as a foundation, then apply the photo makeup adjustments: about twenty percent more color, matte or satin finish, more defined brows, waterproof mascara, blush slightly heavier than everyday, and a lip color one shade deeper than your usual nude. If you wear makeup daily, this will feel natural. If you rarely wear makeup, keep everything soft: a tinted moisturizer, a groomed brow, a coat of mascara, a soft blush, and a tinted lip balm.
The “look like you” test is important. Take a mirror selfie in natural light after your makeup is done and before your session. If the person in the photo is recognizable as you on a normal day, you have done it well. If the photo looks like a stranger, dial back.
How much makeup for senior photos
The right amount is enough to look polished and photograph clearly, no more. For students who wear makeup daily, a full base plus slightly more color across cheeks, eyes, and lips is appropriate. For students who rarely wear makeup, tinted moisturizer, mascara, blush, brow gel, and a tinted lip balm are enough.
The one universal is that you should feel like yourself. Discomfort with your own face shows up in your expressions. If a heavier look makes you feel self-conscious, choose a lighter one. Confidence photographs better than any specific product choice.
Senior picture makeup ideas by style
For a natural style: tinted moisturizer, groomed brows, one coat of waterproof mascara, cream blush in a soft peach or pink, and a tinted lip balm in your natural lip color. Fresh, clean, honest.
For a soft glam style: full foundation, defined brows, neutral eyeshadow with soft depth in the crease, waterproof mascara with individual flare lashes on the outer corners, cream blush blended with a light dusting of powder blush on top, and a satin lipstick in a warm rose or nude. Polished without being heavy.
For an editorial style: full foundation, precisely defined brows, a stronger smoky eye in matte warm browns, waterproof mascara with wispy false lashes, bronzed cheeks with a soft satin highlight on the cheekbones, and a bolder matte lip in berry, terracotta, or a warm red. Dramatic and intentional.
None of these are wrong. Choose the one that reflects who you are, not who you think you should be. Your images should feel like you on the best day of your senior year.
Makeup for young men (yes, this matters)
Male seniors often skip makeup entirely and end up with unflattering shine on the forehead and nose, chapped lips, and unruly brows in every image. A short routine takes five minutes and makes a real difference:
Blot the T-zone with a blotting sheet or a wipe of translucent powder to control shine. Apply chapstick or a matte lip balm to prevent chapped lips in the images. Brush unruly brows with a clear brow gel to hold them in shape. If any specific blemish is prominent, dab a small amount of concealer matched to skin tone, blend with a fingertip, and set with a tap of translucent powder. This is not “wearing makeup.” It is grooming for photographs, and it makes every image look intentional rather than accidental.
For young men with visible facial hair, a fresh trim two to three days before the session shapes the beard or stubble cleanly. Same-day shaving can leave redness or razor bumps that show up in close-ups. Skip same-day trimming unless you know your skin handles it without irritation.
Timeless vs. trendy for senior year
Senior portraits will be looked at in ten and twenty years. Makeup trends move fast. What is on Instagram right now may look dated by the time you graduate college. Skip aggressively trendy techniques (heavy contouring stripes, over-drawn lip lines that extend well past the natural lip, extreme lash lengths, bold graphic liner) unless they are already part of your everyday look.
Timeless choices photograph well in any decade: groomed brows, soft neutral eyes, well-blended blush, and a natural or slightly deeper lip. In twenty years, these will look classic. Trendy choices will look dated.
If you are working with a Phoenix senior portrait photographer, ask them for their honest read on your makeup approach before the shoot starts. Experienced portrait photographers see hundreds of makeup choices and know what tends to age well on camera. A five-minute pre-session review can catch anything that will not translate.

Makeup tips for family photos
Family photos are different from senior photos in one specific way: everyone in the frame has to work together visually. That includes moms, dads, kids, teens, and often grandparents. The makeup guidance for each is different, and coordinating without matching applies to makeup as much as it does to outfits.
Coordinating without matching
For a family group, aim for a consistent level of polish rather than matching looks. If mom is wearing full foundation and defined brows, that is her choice, and dad does not need to match with anything approaching that. If mom is wearing tinted moisturizer and blush, teen daughters should sit at a similar level rather than showing up in full evening glam.
The goal is that no one person in the group photograph looks dramatically more or less made up than everyone else. Kids should look clean and fresh. Adults should look polished. Grandparents should look themselves. Everyone in the same visual key.
Kids and makeup: what to skip entirely
For children under about twelve, skip makeup entirely. Cameras love young skin exactly as it is. Any attempt to “polish” a young child’s skin with foundation or concealer ends up looking like a costume on camera and makes the child self-conscious.
Do prep young kids’ skin the morning of the session: gentle cleanser, moisturizer, chapstick for lips, and a brush of hair. That is enough. If a child has a scraped knee, a bruise, or any temporary mark, do not cover it. Kids’ scrapes are honest and photograph fine. Attempts to cover them look worse than the original mark.
Tinted moisturizer for tweens and teens
For tweens and teens, tinted moisturizer is often the right level. It evens skin tone slightly without looking like heavy makeup, gives a small amount of coverage over any temporary breakouts, and photographs as clean, healthy skin. Choose a shade one closer to their natural skin tone than any full foundation.
For teens who want more, keep it soft: tinted moisturizer, groomed brows, one coat of mascara, a soft cream blush, and a tinted lip balm. This reads as polished without looking older than they are. Save fuller looks for occasions where the teen is the primary subject, like their own senior portraits.
Dads and grandpas: powder, chapstick, brow gel
The three-step routine for male family members takes about three minutes. Powder on the forehead, nose, and chin controls shine. Chapstick prevents chapped-lip look. Clear brow gel brushed through the brows tames stray hairs and holds them in shape through wind.
For grandpas and older men, add one optional step: a tiny amount of concealer under the eyes if there is dramatic shadow, blended with a fingertip and set with a tap of powder. This is not about hiding age. It is about matching the level of polish everyone else in the frame has.
Skip any lipstick, blush, or foundation for men in a family session unless they wear it daily. The goal is fresh and clean, not made-up.
Grandparents and skin: choosing formulas that do not settle into fine lines
Older skin has different needs from younger skin. Heavy powder settles into fine lines and creases. Matte liquid lipsticks can accentuate lip lines. Full-coverage foundation looks flat and cakey on mature skin.
For grandmothers who wear makeup, keep formulas thin and hydrated. A hydrating tinted moisturizer or light foundation photographs more naturally than a full-coverage matte one. A cream blush blends into the skin better than a powder blush. A satin lipstick or lip balm reads more youthful than a matte formula. Skip heavy setting powder except in the shine zones. Keep the finish natural or satin rather than fully matte.
For grandfathers, the same three-step routine used for dads works: blot, chapstick, brow gel. Nothing more is needed unless he wears makeup already.
What the mom of a young family should skip
Mothers of young families often try to do full makeup during a rushed morning that also includes feeding kids, dressing them, and getting everyone in the car. Skip anything that requires precision under time pressure. Skip a smoky eye. Skip a bold lip that requires exact application. Skip false lashes that need extended setting time.
Choose looks that go on quickly and photograph cleanly: tinted moisturizer, a soft eyeshadow wash, waterproof mascara, cream blush applied with fingers, and a tinted lip balm. A five-minute face that photographs beautifully will always outperform a fifteen-minute face that arrives at the session done rushed and slightly wrong.
Working with a family photographer in Phoenix who understands family sessions means the photographer will build in time for last-minute checks and touch-ups. Ask before the session whether there is a moment to review makeup at the start of the shoot.

Makeup tips for engagement photos
Engagement photos have their own considerations: the photos will be used for save-the-dates, wedding websites, and framed prints. There is often kissing in the shots. Sessions tend to run longer than senior or family sessions, sometimes two to three hours with multiple outfit changes. Makeup has to hold through all of it.
Soft glam that reads romantic without going bridal
For engagement photos, the sweet spot is “soft glam.” More polished than everyday makeup, but less finished than your actual wedding day look. Save the fully-done bridal look for your wedding. Engagement photos should feel like the version of you your fiancé sees on a nice date, only slightly more camera-ready.
The soft glam template: full base with concealer, defined brows, warm neutral eyeshadow with light depth in the crease, waterproof mascara, cream blush topped with a light powder blush, subtle satin highlighter on the cheekbones only, and a lip in a warm rose or terracotta. Polished, romantic, and unmistakably you.
Skip anything that reads as too heavy: dramatic smoky eyes, dark contour stripes, deep matte lipsticks, heavy false lashes. Engagement photos are about the two of you together, and heavy makeup pulls focus from the emotion of the images.
Transfer-resistant lip color for close-ups and kissing shots
Kissing shots are part of every engagement session. Regular lipstick transfers within seconds. Transfer-resistant lip color is the only way to survive a kissing shot without smearing across both faces.
Look for lip products specifically labeled as transfer-proof, kiss-proof, or long-wear liquid lipsticks. Traditional lipstick with a setting powder pressed on top can also work but is less reliable than a proper long-wear formula.
Apply lip color, let it fully dry (thirty to sixty seconds), then blot lightly with a tissue to remove any excess. Apply a very thin second coat if needed. Skip any gloss or balm on top before a kissing shot. Add gloss only after the kissing sequence is done, for the shots afterward.
For engagement sessions specifically, pack backup lip color for post-kiss touch-ups. Even the best transfer-resistant formulas can wear at the center of the lip after several kisses. A quick reapplication between shots keeps your images consistent.
Longer sessions, longer wear
Engagement sessions frequently run two to three hours, especially when they include multiple locations or outfit changes. This is significantly longer than most senior or family sessions, which typically last sixty to ninety minutes.
Plan for the longer wear. Setting spray after final makeup. Blotting sheets and touch-up powder every thirty to forty minutes. A refresh of lip color at each break. A hair brush for wind-tossed hair. If your session includes an outfit change, plan a full mid-session touch-up: blot, powder, re-apply lip, mist with setting spray, brush hair, drink water, reset.
Matching your makeup to the outfit and location vibe
An engagement session in a downtown urban setting works with slightly cooler tones (mauve blush, deeper lips, more defined eyes) than a session in a desert or countryside setting, which reads better with warm tones (peach blush, warm nude lips, softer eyes). Match your makeup palette to the outfit palette and to the location vibe.
For sessions with a formal outfit (a long gown, a fitted suit) makeup can lean more polished. For sessions with a casual outfit (jeans, a soft dress) makeup should stay softer to match. A heavily made-up face with casual clothing reads mismatched.
If you are working with a Phoenix engagement photographer, ask them for their read on the palette. Photographers see how makeup interacts with wardrobe and location, and a short pre-session conversation can align everything for the shoot.
A trial run before the day
An engagement session is significant enough to justify a full trial run of your makeup a week beforehand. Do your intended look start to finish. Take phone photos in natural light. Wear it for six to eight hours to test longevity. Note anything that shifts, fades, or reads differently on camera than you expected.
If your trial run reveals problems (a lip color that oxidizes darker, a blush that fades within two hours, a highlighter that catches light too aggressively), adjust before the session. This is the same principle wedding brides follow with a bridal trial. Engagement photos deserve the same attention because they will be seen almost as much as your wedding photos.

How Arizona outdoor light changes the makeup rules
Every outdoor session photographs differently depending on the time of day, and Phoenix outdoor light is particularly variable. Understanding how the light will interact with your makeup helps you make better product choices.
Golden hour warms every tone by two shades
Golden hour is the sixty to ninety minutes before sunset. Light is warm, low, and directional. It flatters skin, but it also warms every color on your face by one to two shades. Pink blush reads more peach. Cool nude lipstick reads warmer. Neutral eyeshadow reads slightly gold.
If your session is scheduled for golden hour and you want your makeup to read as it does in the mirror, pull back on warm tones and lean slightly cooler in your palette to compensate. If you love the warm read of golden hour on your face, wear your normal warm palette and let the light amplify it.
Midday sun shows every texture
Midday sun (roughly 11 am to 3 pm) is the hardest light for portrait photography. The sun is overhead, casting hard shadows under the eyes, nose, and chin. Every texture on the skin is visible. Every shine on the face is amplified.
Skilled photographers rarely shoot outdoor portrait sessions at midday for exactly these reasons. If your session must happen at midday, keep your makeup ultra-matte, use less product than you normally would, blot aggressively, and expect touch-ups every fifteen to twenty minutes. Consider shifting to open shade rather than direct sun for the whole shoot.
Blue hour cools everything
Blue hour is the twenty minutes after sunset, before it becomes fully dark. Light is soft, cool, and evenly diffused. Skin reads slightly cooler on camera. Warm blushes read more mauve. Warm lips read more berry.
For blue hour sessions, lean into cooler makeup tones intentionally. Cool-toned blushes, mauve or berry lips, and slightly deeper eye definition photograph beautifully in blue hour light. Add a hint of highlighter on the cheekbones because the diffused light will not create as much natural facial dimension as harder light does.
Overcast days: the hidden gift
Overcast days are the easiest light for portrait photography. The cloud cover diffuses the sun into a giant softbox. Faces have no harsh shadows. Colors read accurately. Every makeup choice you make photographs closer to how it looks in your mirror.
Phoenix does not have many overcast days, but when one falls on your session date, celebrate it. Your makeup will read exactly as intended, and you can shoot at any time of day rather than being locked to golden hour.

Long-lasting makeup for outdoor photoshoots in Arizona heat
Arizona summer heat, and the residual heat in spring and fall, changes what makeup products work. From about April through October, and especially June through September, heat management is part of your makeup plan.
The physics of sweat vs. foundation
Sweat is water plus salt plus a small amount of oil. Foundation is pigment held together by binders and either water or oil. When sweat meets foundation, the water in the sweat dissolves the water-based binders in most foundations. This is why makeup that lasted all day at work last winter suddenly slides off your face at your outdoor session in June.
Water-resistant and long-wear foundations are formulated to resist this. Look for foundations specifically labeled as long-wear (typically twelve to twenty-four hour wear claims), sweat-resistant, or transfer-resistant. These use different binders that hold up better against sweat. Test whichever formula you choose before session day, because performance varies.
Cream products vs. powder in triple-digit heat
Conventional wisdom says powder is better for oily skin. In Phoenix summer heat, this is not always true. Powder mixes with sweat and turns cakey on the skin surface. Cream products melt slightly but often blend smoothly into the skin instead of flaking or caking.
The specific rule: use powder to set, not to build coverage. Cream foundation, cream blush, cream contour, all applied lightly, then set with a very thin layer of powder only on the T-zone. This gives you the buildable coverage of cream products with the longevity of a powder set. Touching up with powder mid-session (over blotted skin) works. Adding more powder to already-powdered skin does not.
Waterproof, water-resistant, and long-wear labeling explained
Terminology on makeup packaging is not always precise. Loosely:
- Waterproof: designed to resist water directly, including tears and rain. Usually mascara and eyeliner.
- Water-resistant: resists water for a limited time (often thirty to forty minutes) but not indefinitely.
- Long-wear or long-lasting: designed to resist smudging, fading, and transfer over an extended period. Not always water-resistant.
- Transfer-resistant or transfer-proof: designed to resist rubbing off onto clothing, other faces, or your hands. Common in liquid lipsticks.
For a Phoenix summer session, prioritize long-wear or transfer-resistant labeling on foundation, and waterproof on mascara. For lipstick, transfer-resistant is more important than water-resistant, unless you know you will be near water during the session.
A pre-session cooling routine
The single best thing you can do for makeup longevity in Phoenix heat is arrive at the session cool, not hot. If you arrive already sweating, no product will save your makeup.
Start the morning by staying inside air conditioning while you get ready. Do makeup with a fan on, not in a warm bathroom with the door closed. Get in the car with the air conditioning on high. Ice water in your bottle. A cold pack on the back of the neck for a few minutes before you get out of the car. All of these buy you an extra thirty to sixty minutes of fresh makeup once the session starts.
Monsoon humidity: what changes between July and September
Phoenix monsoon runs from mid-June through September, with the humidest days typically falling between mid-July and mid-September. Humidity changes how makeup performs. Powder settles more heavily. Cream products can feel greasy. Setting spray takes longer to dry.
For monsoon sessions, lean cream over powder except for the T-zone. Set less than you usually would. Use a matte setting spray, and use it sparingly. Blotting sheets are more important than powder for mid-session touch-ups. Bring extra hair pins because humidity will fight against every attempt to keep hair in place.
Monsoon storms also mean sudden weather. A perfectly clear afternoon can become a dust storm and thunderstorm in thirty minutes. Have a backup plan with your photographer for weather-related reschedules, and keep your touch-up kit in a sealed bag so a sudden downpour does not ruin it.

Makeup mistakes to avoid before a photoshoot
Most makeup problems on session day trace back to a small number of specific mistakes. Each is fixable if you know to watch for it.
SPF flashback and silica-based powders
Foundations with high SPF (15 and above) and silica-heavy setting powders both reflect light in ways that can wash out your face on camera. This is more common with flash photography, but it can happen outdoors under bright midday sun. Choose a foundation without SPF (apply a separate sunscreen underneath), and choose a setting powder without heavy silica.
Over-powdering the whole face
Applying too much translucent powder is one of the most common photo makeup mistakes. Heavy powder flattens the face on camera, cakes into fine lines, and drains natural dimension. Use powder only on the T-zone, and only lightly. Cheeks, temples, and undereyes should stay largely powder-free.
Mismatched foundation and neck
Foundation matched to your face color, without matching your neck, creates a visible line at the jaw. Always match foundation to your neck, not your face. Test in daylight before session day.
Heavy shimmer highlighter under bright sun
Highlighter with visible shimmer or glitter catches sun as bright reflective points on the face. In bright outdoor light, this reads as grease or hot spots rather than glow. Choose a satin-finish highlighter instead, applied lightly and only to the tops of the cheekbones.
Overly dark lower-lash eyeliner
Thick dark liner under the eye can make the eye look smaller when you smile and accentuate fine lines. Use a soft matte eyeshadow smudged under the outer third of the lower lash line instead of a hard pencil line under the whole lower lash.
Trying a new product on session day
Trying a new foundation, a new lipstick, or a new mascara for the first time on session day is a mistake. Any new product can behave unexpectedly on your skin. Break in every product for at least one full day of normal wear before your session.
Skipping the trial run
Doing your intended session makeup start to finish, at least once, a week before the shoot is essential. A trial run catches products that oxidize, formulas that do not hold up, and application choices that read differently on camera than in a mirror. Take phone photos during the trial run to see how the makeup translates.
Fake tan applied the night before
Self-tanner applied within twenty-four hours of the session almost always looks orange in the images, uneven at the edges (wrist, ankle, hairline), and streaky in movement. If you tan, do it four to five days before the session so the color develops evenly and any patchy spots have time to fade.
Waxing the day before
Waxing (brows, upper lip, chin) can leave visible redness for twelve to seventy-two hours. Book any waxing at least three days before your session, ideally five. Same for professional dermaplaning, threading, and any other skin service that can cause temporary irritation.
Chapped or unprepped lips under matte lipstick
Matte lipstick sits on top of dry skin and exaggerates every flake and crack. Prep lips with a lip scrub two nights before the session and again the night before. Apply lip balm twenty to thirty minutes before makeup. Blot excess balm before applying lip color. Skipping this step is what causes matte lips to look cracked and uneven on camera.

Should you hire a makeup artist for your photoshoot?
Hiring a professional makeup artist is worth it for some clients and unnecessary for others. Here is an honest read on when to book one.
When hiring a pro is worth it
For any session where you want maximum polish and cannot easily achieve it yourself, a pro is worth the cost. Specifically:
- If you rarely wear makeup and are not comfortable doing your own for photos
- If your session is an engagement session and you want a bridal-trial-quality look
- If your session is in a season or location where heat and sweat will fight against your makeup all afternoon
- If you have a specific look in mind that requires techniques you have not practiced (a specific eye shape, false lashes, a contoured face)
- If the session is a group family session and you want everyone to look coordinated in polish
- If you want to save the mental energy of doing your own makeup on session day
A photo-experienced makeup artist uses products designed for cameras, applies technique specifically for photography, and knows how to make makeup last through a full session in Phoenix heat.
When doing your own makeup is the better call
Doing your own makeup is fine if:
- You wear makeup daily and are comfortable with your routine
- Your session is short (under an hour)
- Your budget is tight and you would rather put the money into more session time, a print package, or a location upgrade
- Your personal style is minimal and a pro look would feel out of character
- You know your face and know what photographs well for you
If you are on the fence, doing your own makeup with a good routine, tested products, and a real touch-up plan works well for most clients.
How to find a photo-experienced makeup artist in Phoenix
Ask your photographer for recommendations first. Photographers work with makeup artists regularly and know who does great work on camera specifically (which is different from who does great work for evening events). Ask for portfolios of their client work under natural outdoor light, not studio-lit editorial images. Ask about their experience with outdoor sessions in Phoenix summer.
Instagram searches for hashtags combining Phoenix with wedding, senior, or family makeup artistry will surface local artists. Look at their real client work, not their editorial pieces. Real client images show how they handle a variety of skin tones, features, and lighting conditions.
Book at least six weeks in advance for weekend sessions during peak season (October through April). Popular photo-focused makeup artists book out further than wedding-focused ones because sessions are shorter and their schedules fill differently.
What to ask before booking
Before booking, ask:
- Do you offer a trial before the session? (For engagement sessions especially, a trial run is standard.)
- What products do you use for long-wear in Arizona heat?
- Will you travel to my location, and is that included in the price?
- How much time do you need with me before the session starts?
- Do you offer touch-up services during the session, or is it single-application only?
- What is your reschedule policy if my session date changes due to weather?
Clear answers on these questions make session day smooth. Vague or evasive answers are a signal to keep looking.
Touch-up kit essentials for your session
A real touch-up kit takes fifteen minutes to pack and saves the second half of your session. Include:
- Blotting sheets (one full pack)
- Translucent powder in a compact you can carry
- The exact lip color from your base look (not a similar one)
- A small mirror (larger than a phone screen)
- A small brush for powder application
- Chapstick or lip balm for reapplication if needed
- A small hair brush or comb, plus a few hair pins
- A water bottle with a straw (protects your lip color while drinking)
- A small towel or facial tissues for sweat wipes
- An extra hair tie in your color
- Fashion tape for outfit adjustments
- A small deodorant for freshening up between outfit changes
For engagement sessions, add a second full set of lip color and a small setting spray. For family sessions with kids, add wipes, a small snack, and any small toy that helps a child reset if they melt down. For senior sessions in Phoenix heat, add a portable handheld fan.
Pack the kit in a small bag you can hand to your photographer or a family member to hold during the session. Everything should be reachable in under ten seconds when you need it.

Frequently asked questions about photoshoot makeup
What makeup should I wear for senior pictures?
For senior portraits, choose a matte or satin base with about twenty percent more color than your everyday routine. Groomed brows, waterproof mascara, cream blush, and a lip color one shade deeper than your usual nude photograph well. The goal is to look like the best version of yourself, not a completely different person.
How much makeup is too much for photos?
Enough is when you still look like yourself in a phone selfie taken in natural light. Too much is when someone glancing at the photo would not recognize you at first. Cameras soften color, so slightly more than everyday reads as polished. Dramatically more than everyday reads as costume, especially in casual outdoor sessions.
Should I hire a makeup artist for senior photos?
Hiring a professional makeup artist is worth it if you rarely wear makeup, if you want a specific look you have not practiced, or if you want to hand off the getting-ready effort. Doing your own makeup is fine if you wear it daily and know what photographs well for you.
What is the best long-lasting makeup for outdoor photos in Arizona heat?
Look for foundations labeled long-wear or sweat-resistant, cream blushes set with a light dust of powder, transfer-resistant liquid lipsticks, and waterproof mascara. Finish with a matte setting spray. Blot with blotting sheets, not powder, for mid-session touch-ups. Cream products often outperform powder in Phoenix heat.
How do I stop my makeup from melting in Phoenix heat?
Arrive at the session cool, not already sweating. Get ready with a fan on, drive with air conditioning high, and use a cold pack behind the neck before starting. Use long-wear formulas, set only the T-zone, and finish with a matte setting spray. Blot mid-session with blotting sheets before touching up powder.
What makeup should I skip for engagement photos?
Skip heavy false lashes, dramatic smoky eyes, sticky glosses, and any lipstick that transfers easily. Kissing shots will move color everywhere. Choose transfer-resistant liquid lipsticks, soft neutral eyes, and cream blush that photographs romantically. Save the fully-done bridal look for your actual wedding day rather than duplicating it for the engagement session.
Do kids need any makeup for family photos?
No. Children under about twelve should skip makeup entirely. Prep young kids’ skin with cleanser, moisturizer, and chapstick, then leave it alone. Cameras love young skin as it is. Attempts to cover scrapes, freckles, or minor blemishes usually look worse than the natural feature. Tweens and teens can use tinted moisturizer if they choose.
What foundation is best for outdoor family photos?
Choose a lightweight, buildable foundation without high SPF, matched to your neck rather than your face. Long-wear or sweat-resistant formulas hold up better in Phoenix heat. Apply thin layers with a damp beauty sponge, add concealer only where needed, and set the T-zone with a light powder. Cream foundations often photograph more naturally than heavy full-coverage formulas.
How do I do natural-looking makeup for photos?
Start with prepped, hydrated skin and a lightweight foundation matched to your neck. Add cream blush, waterproof mascara, filled brows, and a tinted lip balm or satin lipstick close to your natural lip color. Skip heavy contour, glittery highlighter, and false lashes. The rule is enhancement, not transformation. Take a phone selfie to check.
What makeup mistakes ruin photos most?
The top mistakes are using foundation with high SPF (causes flashback), applying too much translucent powder (flattens the face), mismatching foundation to your neck (creates a visible line), heavy shimmer highlighter under bright sun (reads as grease), and trying new products on session day. A trial run a week before catches most of these before they matter.
Ready to plan your outdoor session
The right makeup for your outdoor session is the makeup that photographs cleanly, holds up through Phoenix heat, and still looks like you when you see the final images. That balance is easier to hit when you know how outdoor light and Arizona conditions actually interact with cosmetics, and when you choose products with those conditions in mind. Skin prep starts two weeks out. Formula choices matter more than product names. A trial run a week before the session catches problems while there is still time to fix them. If your session is indoors instead of outdoors, the rules shift, and our guide to makeup tips for a studio photoshoot covers the changes for controlled indoor light. When you are ready to book, at Kandid Clicks Photography we will walk through your specific session type, your comfort level with makeup, and what your day will actually look like. Show up prepped. Bring the touch-up kit. We will handle the rest.